draw a 3d sun in after effects
An Intro to Subsequently Effects 3D
After Effects is an extremely powerful program. I believe it's much more powerful than most people think. The application has many features that often go overlooked, such as the Archetype After Effects 3D renderer. This feature provides a number of tools and settings which permit you to change the AE workspace from 2D to 3D. Y'all tin create and customize virtual lights and cameras for some interesting and dynamic results. If you've been using the program for a while, this feature tin help bring your motion graphics to the next level.
For more advanced features such as extruding text and shape layers, you can piece of work in the Cinema 4D or Ray-traced 3D renderer. To access and change the renderer, go to Limerick > Composition Settings and select the 3D Renderer tab. Nevertheless, since this is a beginner's guide I'm going to stick with the Classic 3D renderer workspace.
To become started with a 3D project, we beginning need to have a few 3D layers with which to work. It's important to realize that when working in the Archetype 3D renderer workspace we'll simply be manipulating 2nd layers in 3D space. There will exist no 3D objects with any kind of extrusion. While nosotros will telephone call these layers "3D", they're still flat images. We're essentially creating a 3rd dimension (Z infinite) to our project and calculation Z attributes to our 2D layers. Let's have a closer look at how to attain this.
Switching to After Effects 3D
To convert a layer from 2D to 3D, simply select the 3D layer switch in the Timeline or go to Layer > 3D Layer.

If you tin can't see the 3D layer switch, press the Toggle Switches/Modes push located at the lesser of the Timeline panel. Once again, the 3D switch essentially adds a 3rd dimension (Z-axis) to a layer. With this new axis comes a plethora of additional Transform backdrop, including Z information for Position, Anchor Betoken, and Scale. You'll also notice Orientation and individual Rotation properties for Ten, Y, and Z axes.
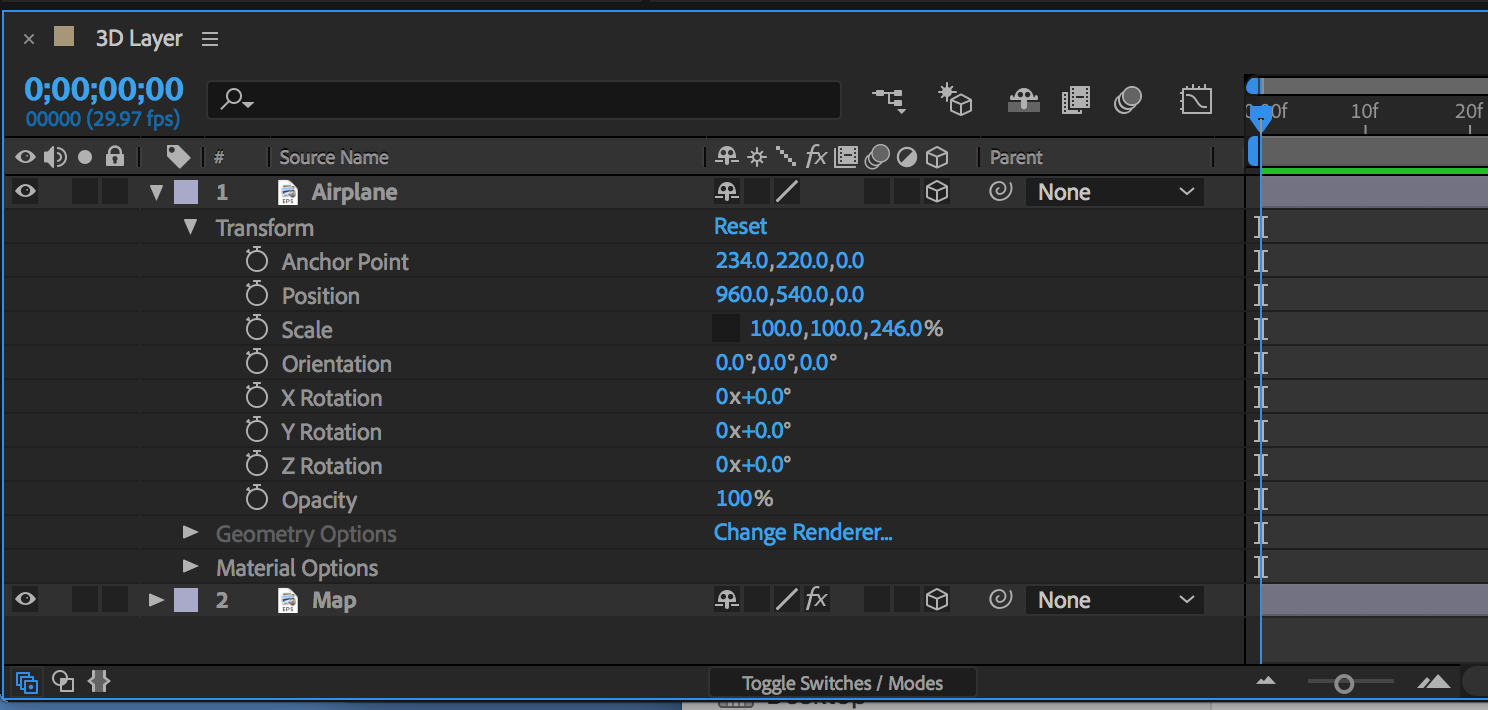
Also, when y'all switch a layer to 3D, 2 new sections appear underneath the Transform properties—Geometry and Textile Options. Since you're working in the Classic 3D renderer, Geometry Options remains greyed out. These options are only available when working in the Movie theatre 4D or Ray-traced 3D renderer, which we won't exist discussing in this tutorial.
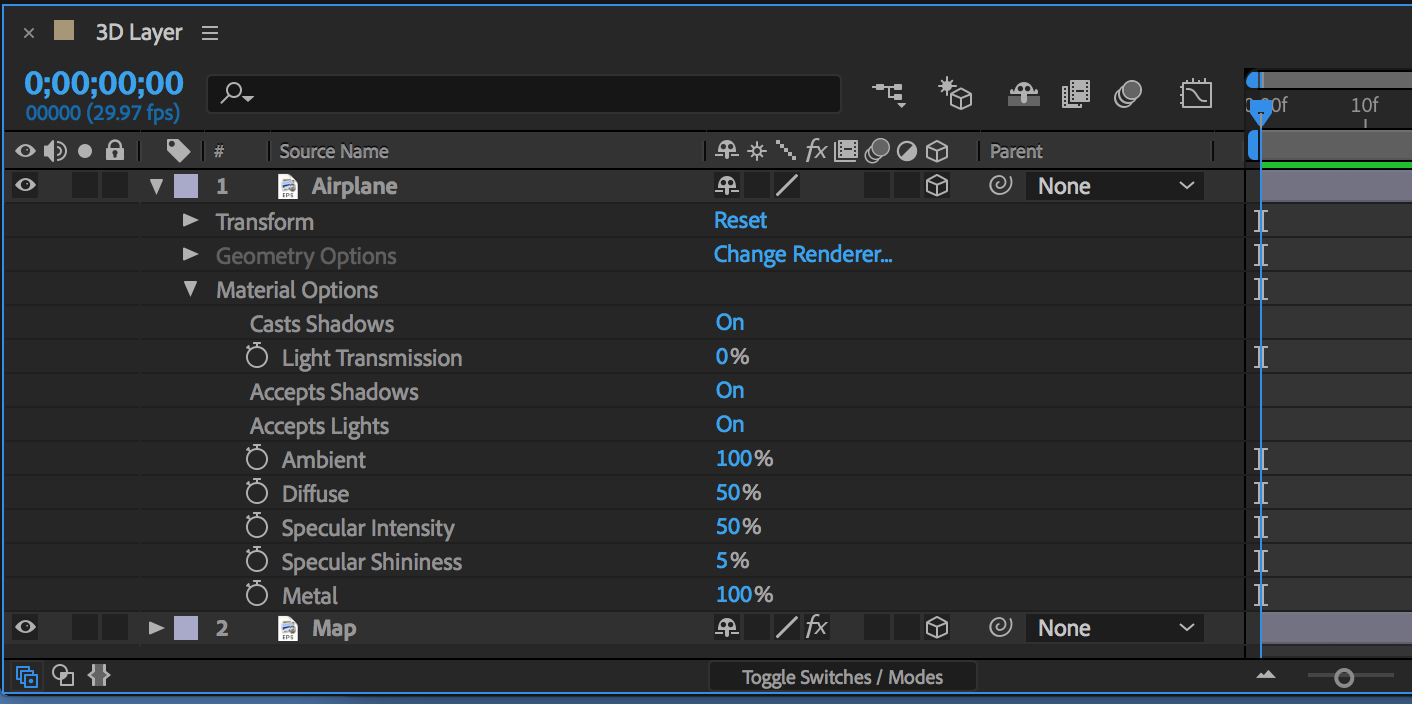
The Textile Options specify how an After Effects 3D layer reacts to light layers. Nine different options allow you to customize how your layer will accept light and shadows.
If yous deselect the 3D switch, your layer volition lose all of these boosted properties and whatever associated keyframes. Whatever keyframes previously added to these attributes will remain lost, fifty-fifty if you reactivate the 3D switch. So only click that button if you're prepared to throw away that data.
Working with Subsequently Effects 3D Layers
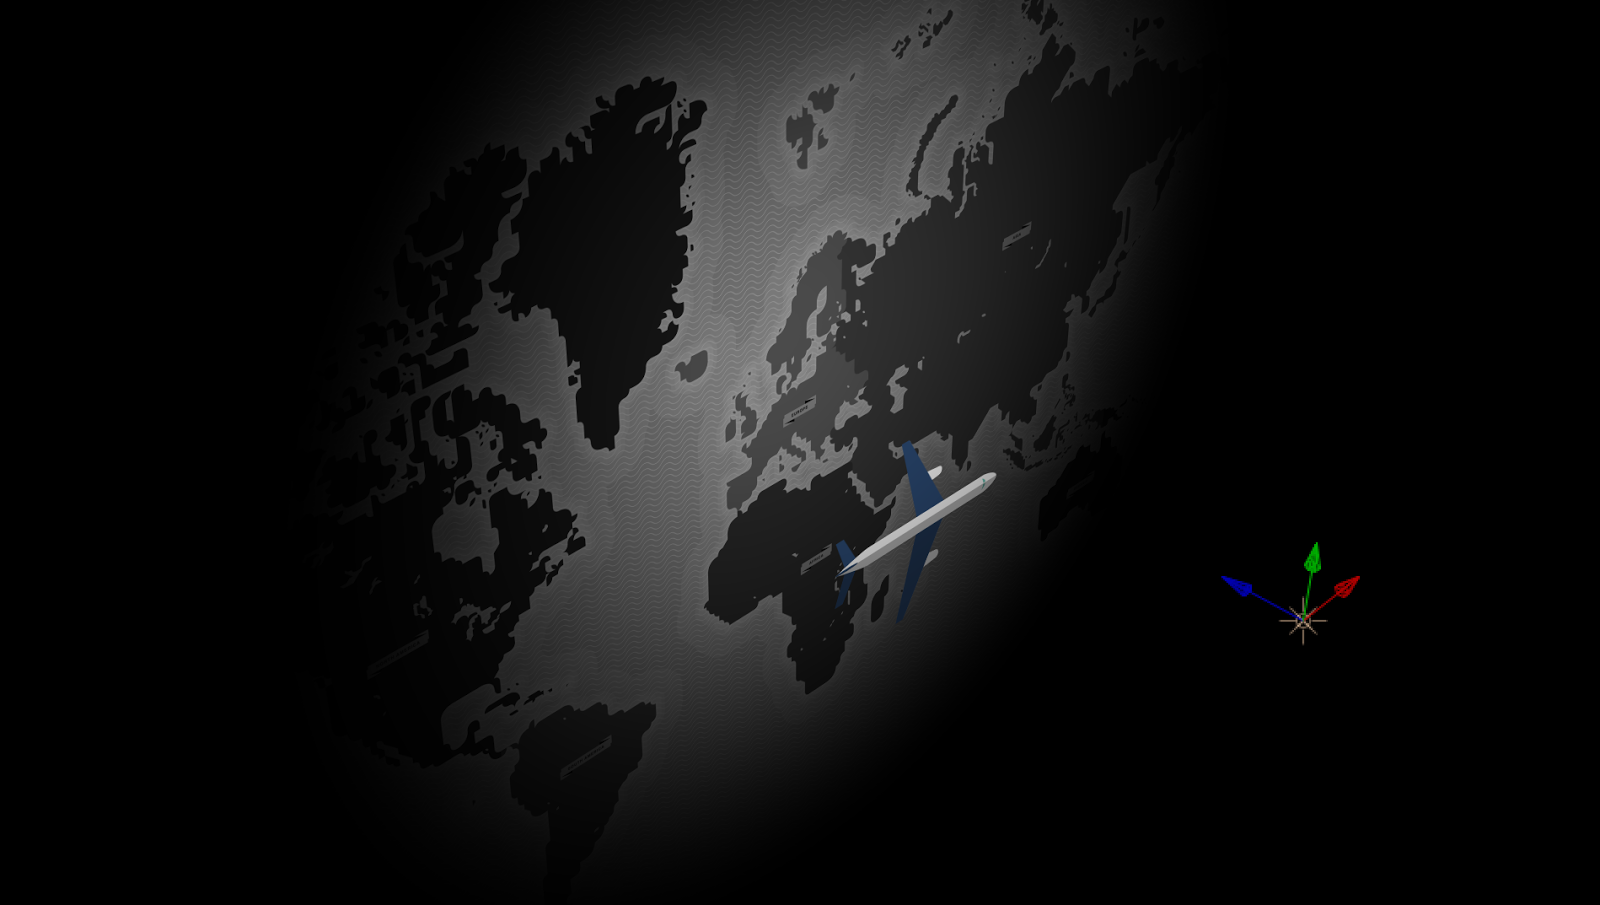
A 3D layer has color-coded arrows that permit you lot to manipulate the layer on its various axes—red for X, green for Y, and blue for Z. As you hover your cursor over the layer's arrows, a tooltip will evidence you which centrality you're over. This is especially helpful when working with multiple 3D elements in a complex workspace.
Frequently times when working in 3D space y'all can't tell where an nugget is located in Z space (the space that measures the axis that moves towards yous and away from you). A layer might fifty-fifty disappear entirely backside another 1. To get a ameliorate view of your work surface area, just change the view layout.
The Subsequently Furnishings 3D View Popout menu is located at the lesser of the Limerick panel and allows you to view your comp from a variety of angles. These angles include Active Photographic camera, Front, Left, Top, Back, Right, or Bottom. It's nearly impossible to work on a 3D project without occasionally changing the view of the limerick.
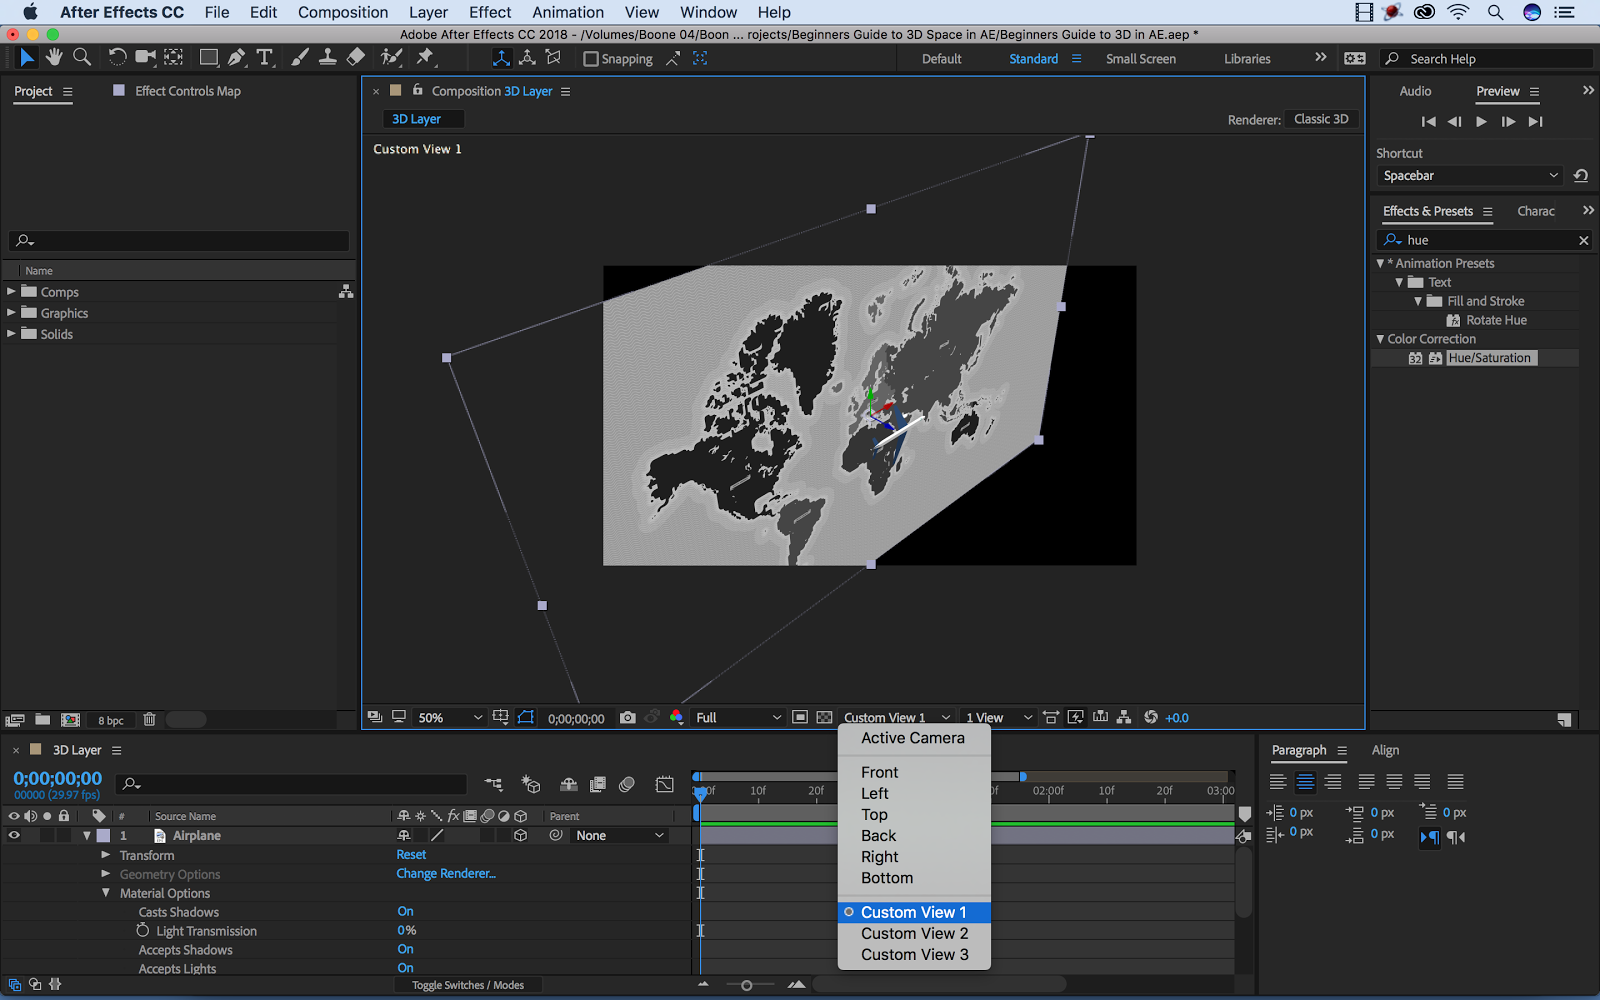
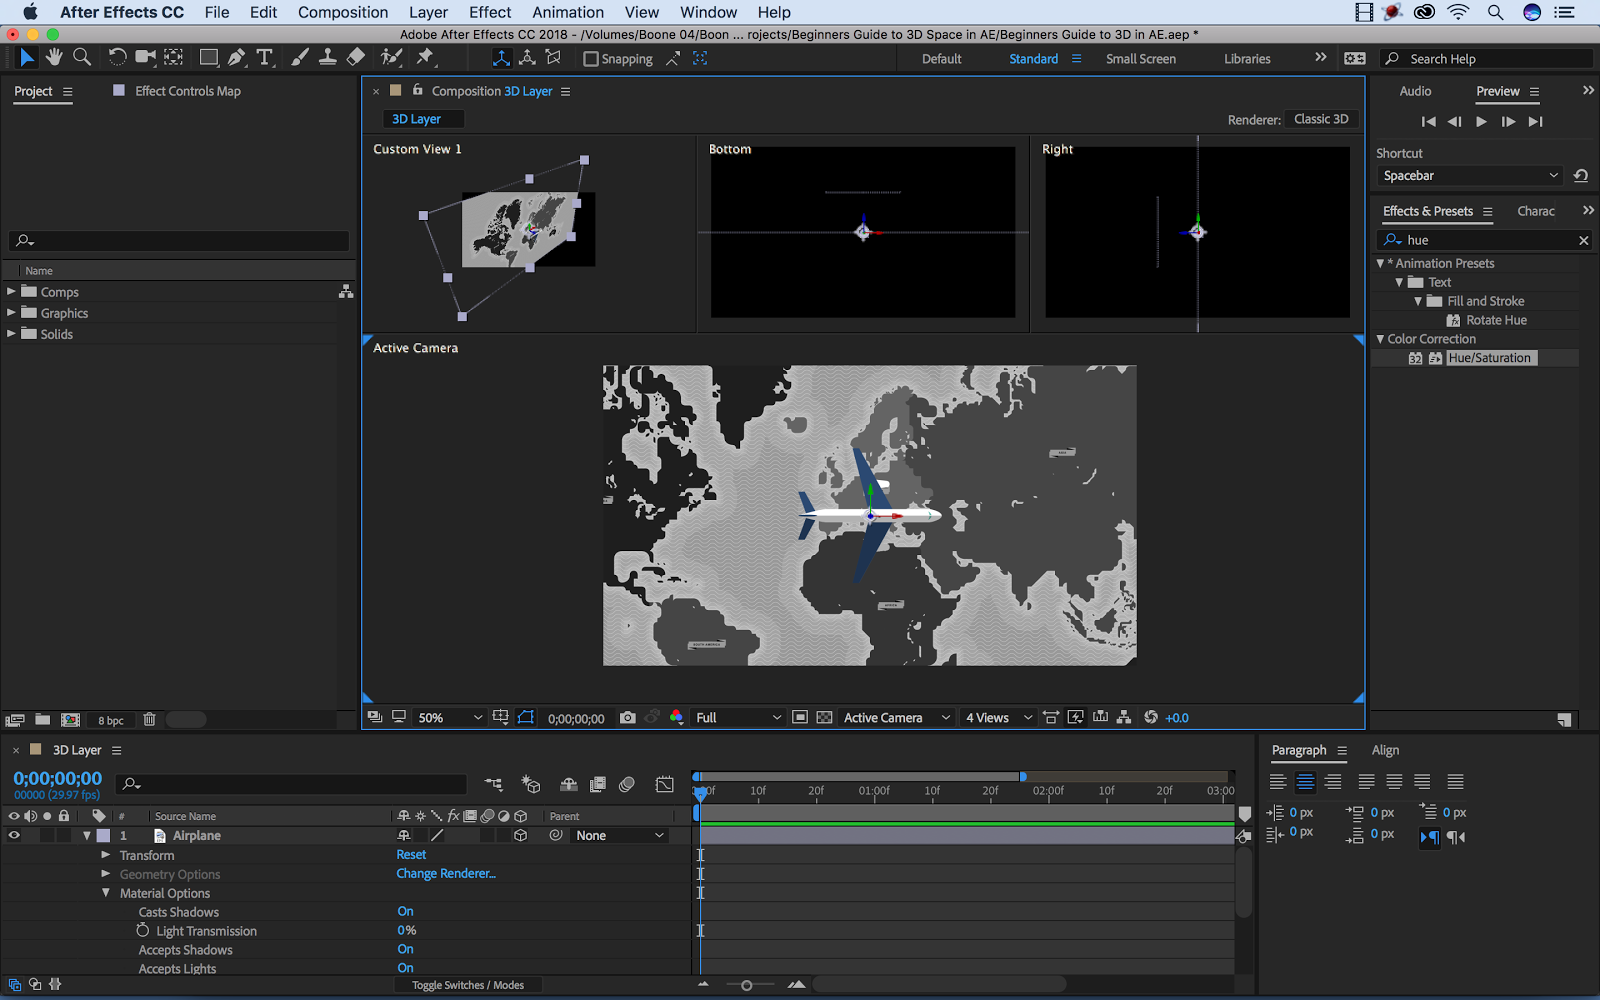
If you prefer to view several angles at the same time, become to the Select View Layout drop-down menu. Cull to view 1, 2, or 4 angles simultaneously. You lot can also take a bird's eye view of your projection with three different Custom Views.
Afterwards Effects 3D Cameras
An boosted style to view your project is with a virtual camera.While the preset views are more-or-less fixed,cameras allow you to fly around in 3D space and specify exactly from which angle you're viewing the elements of your Subsequently Effects composition. A camera layer comes with all of the standard transform attributes, likewise equally a variety of features similar to a real-world photographic camera. These include Zoom, Depth of Field, Focus Altitude, Aperture, equally well as a handful of other options. All of these camera attributes are key-framable to brand smooth photographic camera moves. Permit'south have a look at how to work with cameras in Later Effects.
Working with Cameras
To create a camera, simply highlight the Timeline console and select Layer > New > Camera.
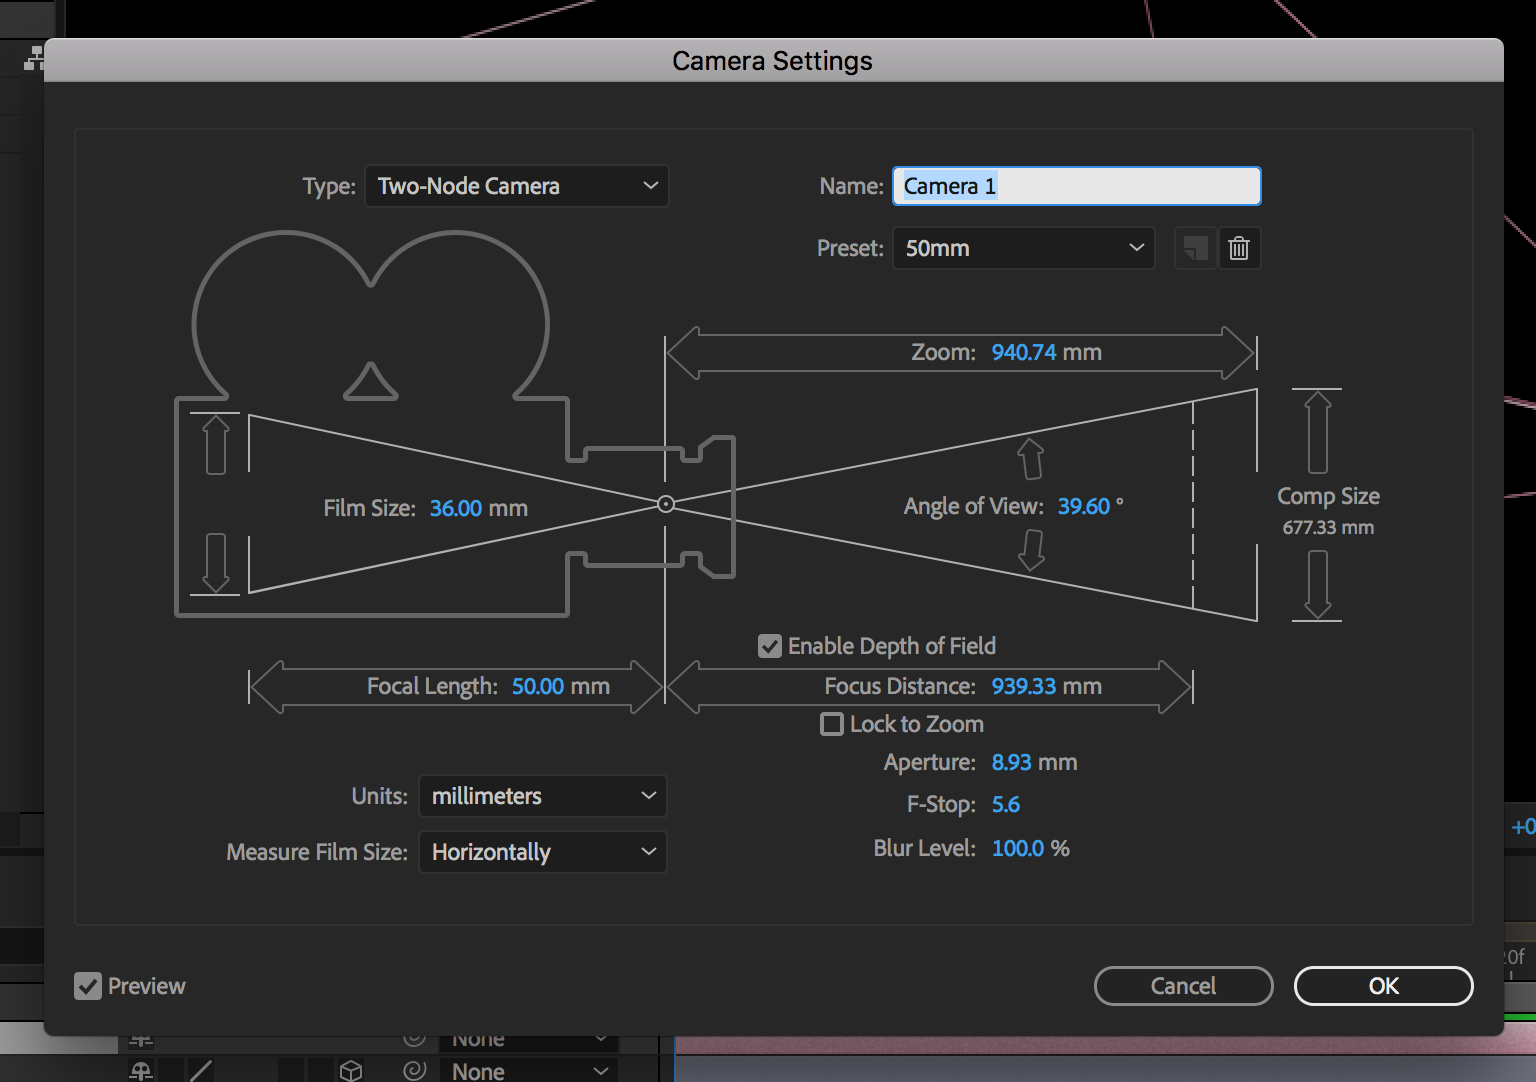
When you create a new camera layer, a Photographic camera Settings dialog box volition announced. Here you can modify your camera attributes with a helpful visual reference. If you have a fiddling technical knowledge of camera settings then you can customize to your heart'south content. Manually adjust the Film Size, Zoom, Bending of View and Focal Length. You tin can even Enable Depth of Field and customize the Focus Altitude, Discontinuity, F-Stop and Blur Level. If you don't want to modify all of the individual settings, simply choose a preset. Double click the camera layer at whatever time to reopen and make adjustments in this dialog box.
Camera Settings
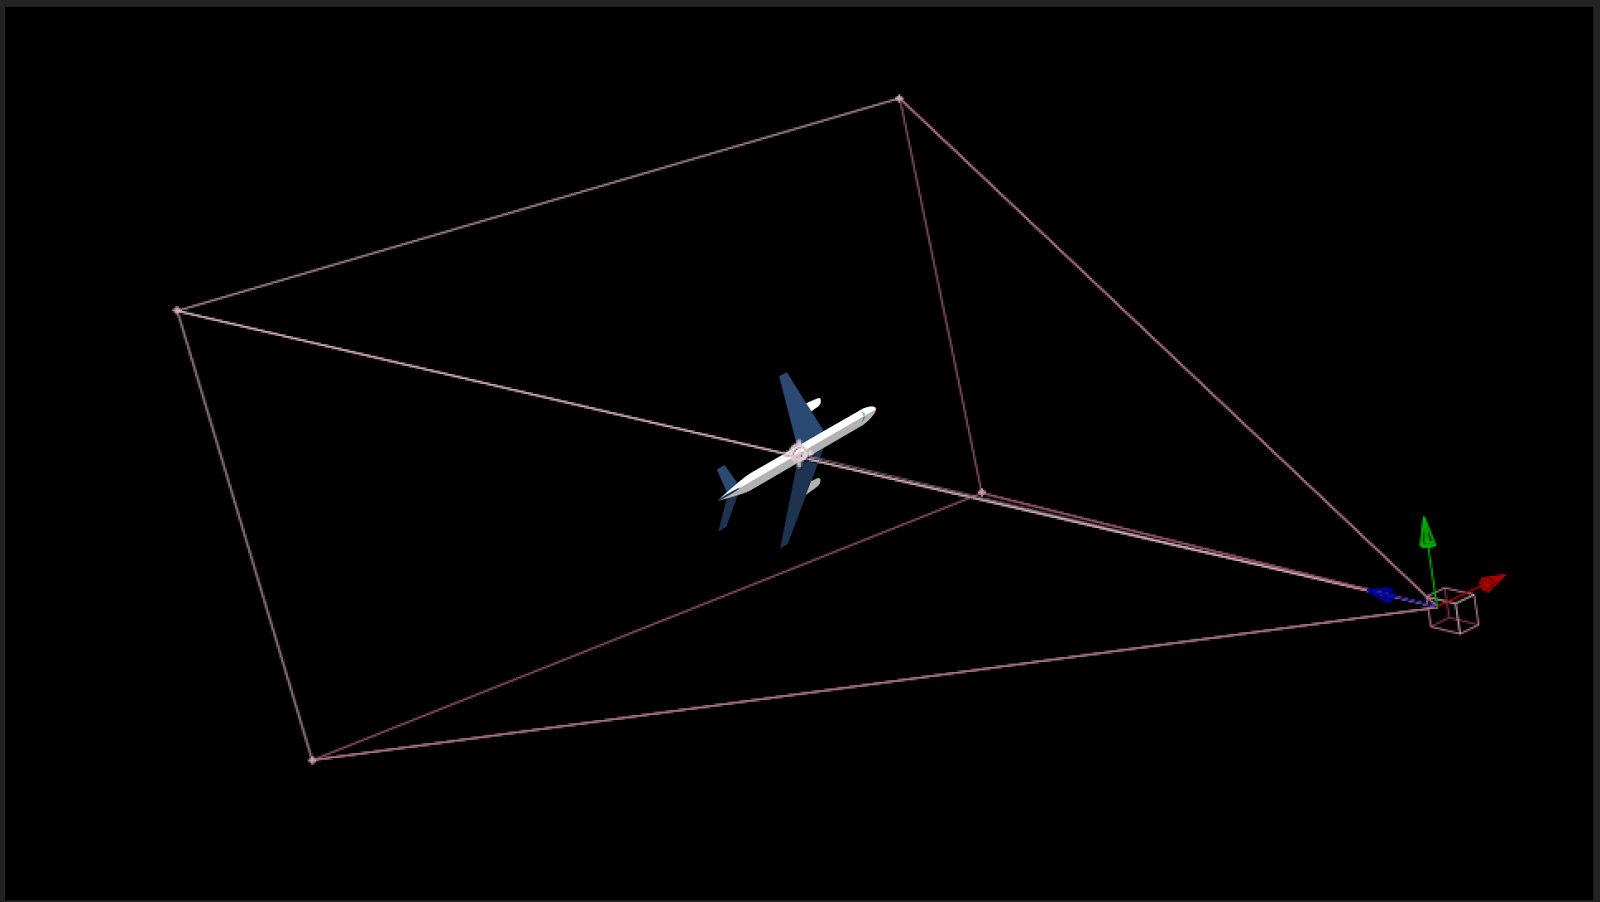
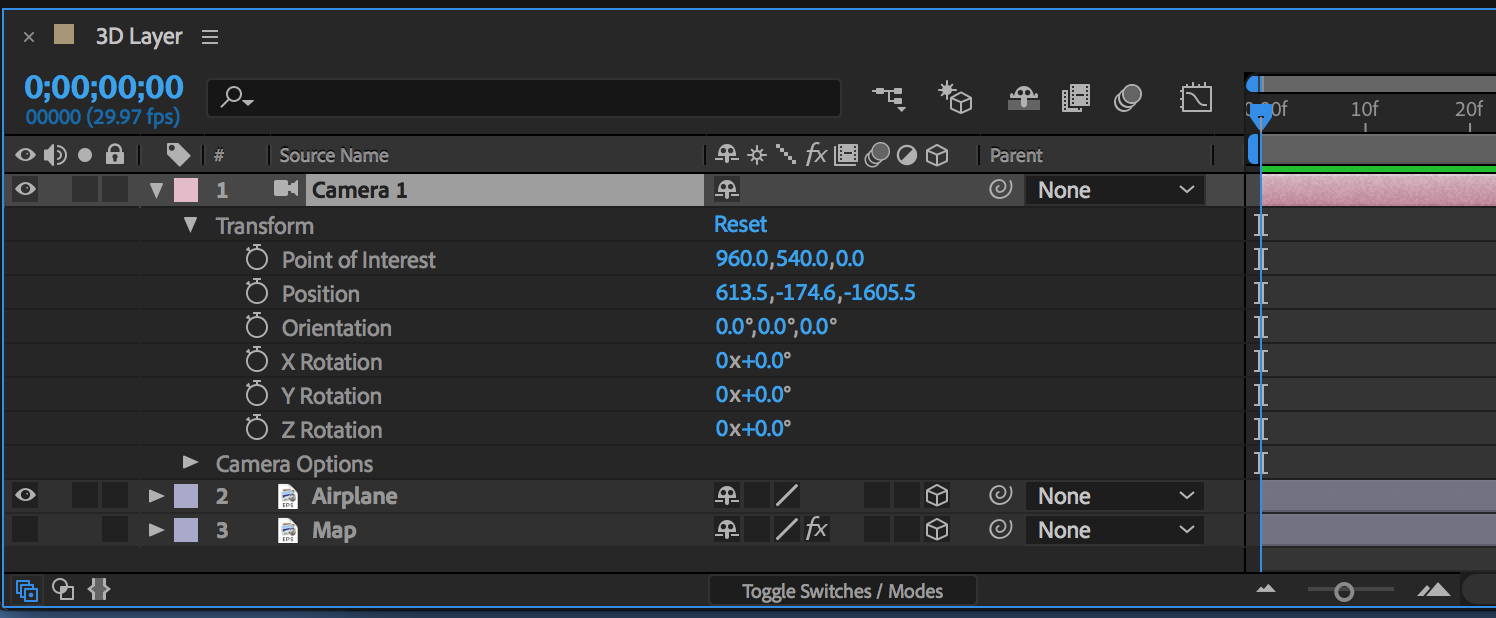
Later Effects offers 2 different camera types—one or two-node. The only deviation between a one and two-node camera is that a ii-node includes and is oriented toward a "Point of Interest." When you open up the Transform properties of a two-node camera layer, you'll run into a Point of Interest aspect with X, Y, and Z attributes.The Point of Involvement essentially allows you to control what the camera is looking at very precisely, and information technology can come in very handy.
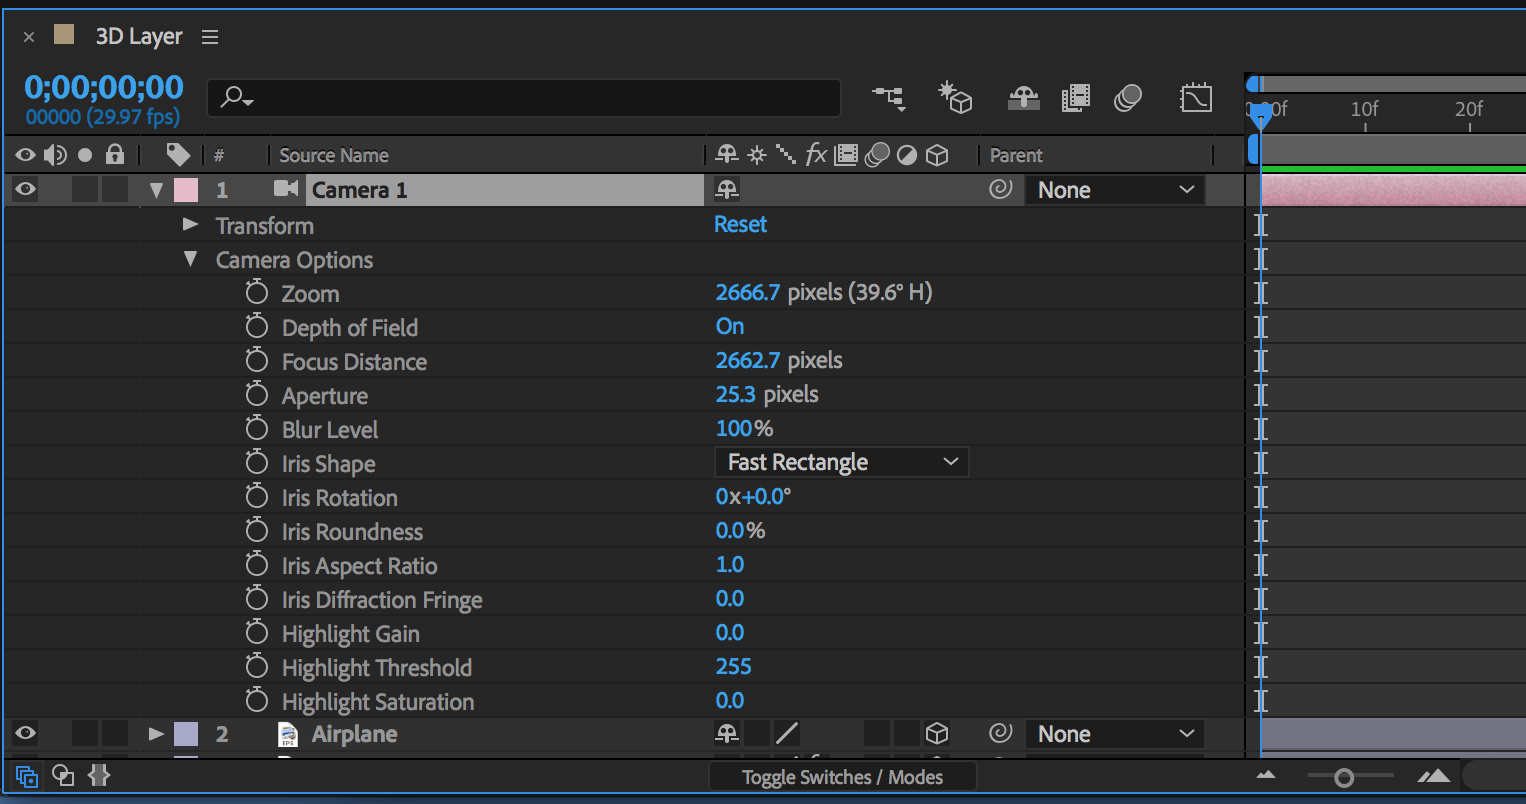
Merely below the photographic camera's Transform properties, yous'll find thirteen different Camera Options. These 13 properties include attributes inside the Photographic camera Settings dialog box with a few additional tools to make detailed adjustments to the camera. These boosted tools allow yous to fine-tune how the camera'south iris is set up, and adjust how the photographic camera deals with highlights. Again, to reopen and make adjustments in the Camera Settings dialog box, double-click the camera layer on the timeline.
Amazingly, you can add keyframes to any and all of the thirteen camera options in the Timeline panel. Add keyframes for some interesting 3D camera effects, such as a snap zoom or a rack focus. The possibilities are truly limitless. Again, this is the time where knowing a fiddling technical information nearly cameras will aid you out profoundly.
After Furnishings 3D Tools
There are various camera tools in Later Effects that allow yous to navigate and fly your photographic camera around the 3D space of your composition. Pressing keyboard shortcut C will cycle between four different camera tools—Unified, Orbit, Track XY, and Track . Remember, in order to see what your camera sees, change the 3D View Popout at the bottom of the Limerick panel to the specific camera, or select Active Camera. Now permit'southward take a closer look at each camera tool.
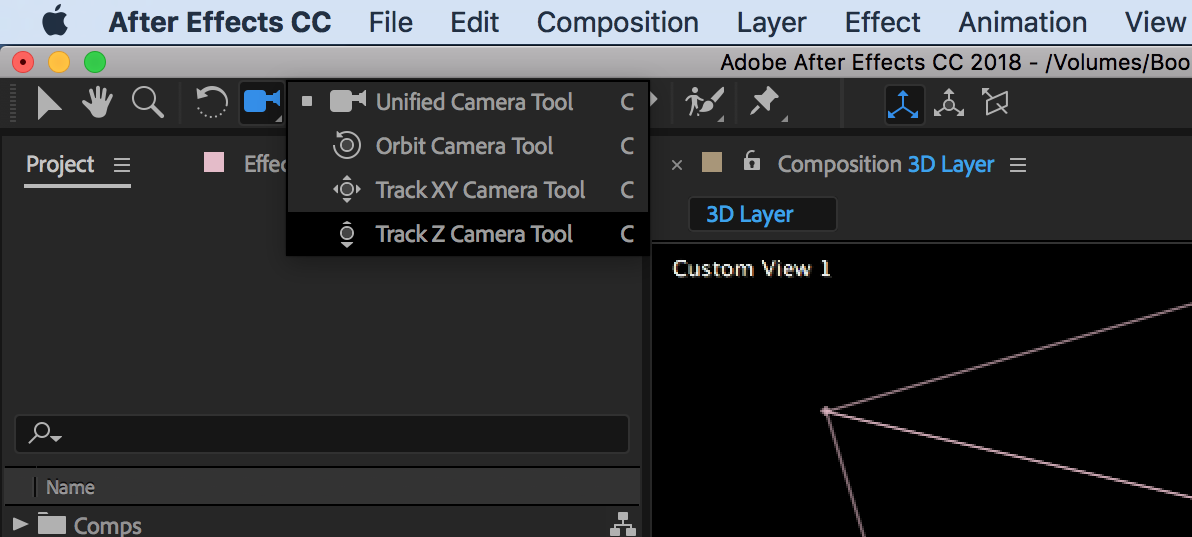
Unified Camera Tool
The Unified Photographic camera tool allows you to switch betwixt the other iii camera tools. Use a mouse to quickly spring between the Orbit, Track XY and Track Z photographic camera tools.
Orbit Photographic camera Tool
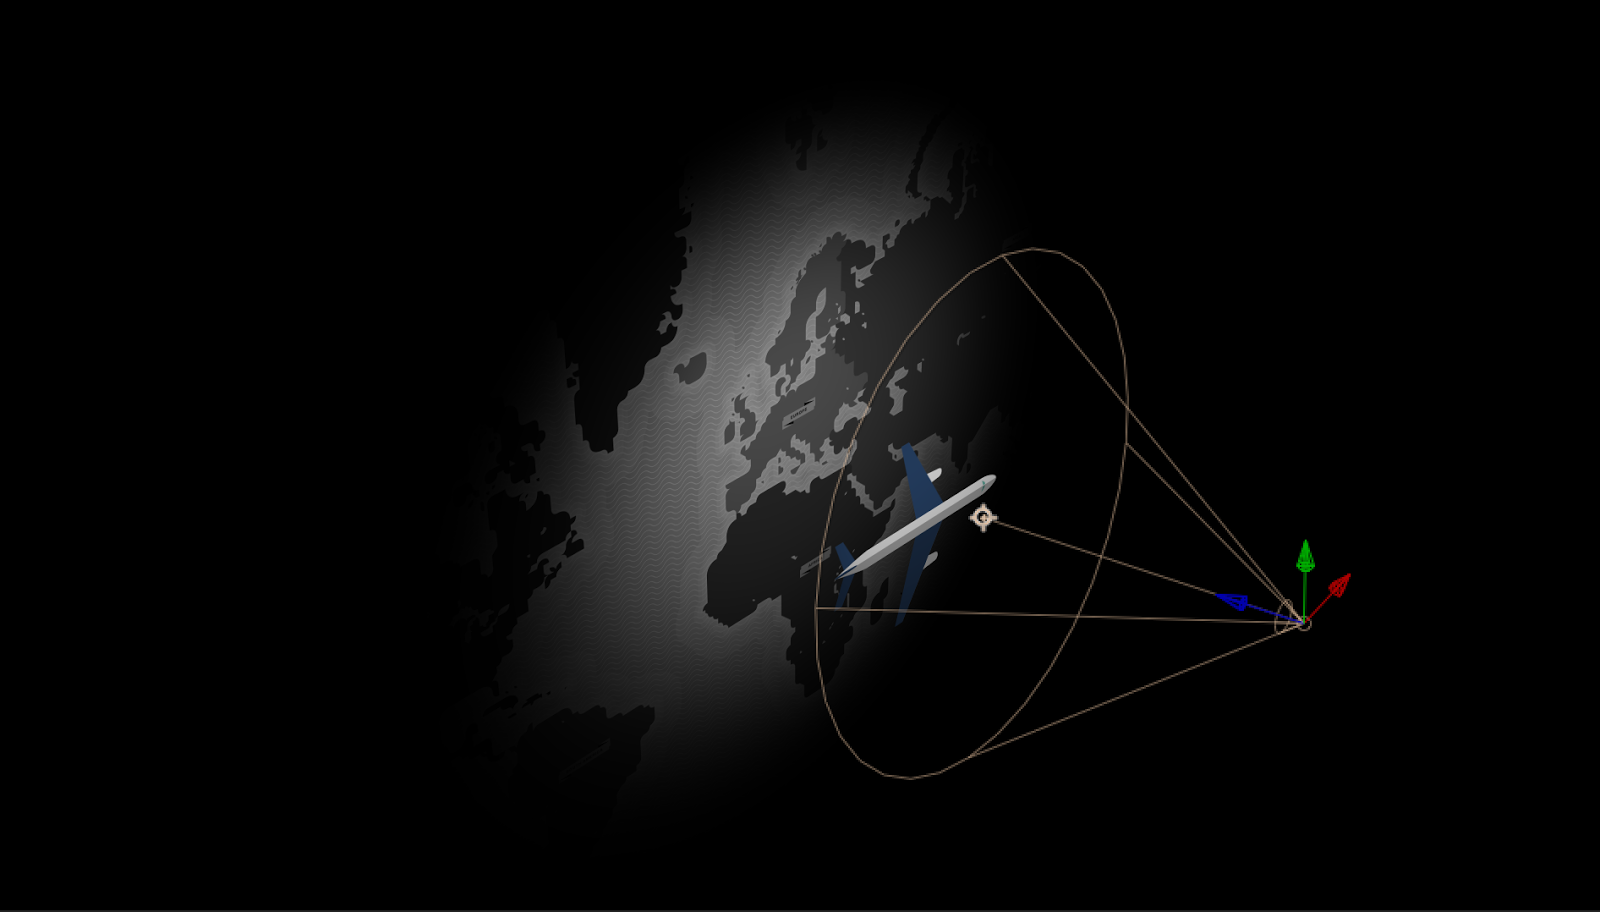
Using the Orbit tool will movement, or "orbit", your camera around the Point of Interest. The camera positions modify, while the Betoken of Interest stays locked in place. Orbiting a 1-node camera will only alter the Orientation of the photographic camera since there is no Point of Interest with one-node cameras.
Rail XY Photographic camera Tool
Every bit the name implies, the Runway XY photographic camera tool will motion the camera horizontally and vertically in 3D space. The Bespeak of Involvement likewise moves along with the photographic camera.
Rails Z Photographic camera Tool
Again, as the proper name implies, the Track Z camera tool will motility the camera forrad and backward in 3D space.
Simulating Camera Moves
You can quickly create motility paths to simulate existent-world camera moves by animating Position and Point of Involvement attributes of a camera layer with a couple keyframes. Take a look at a few examples below.
Pan
Tilt
Zoom
Pedestal
Dolly
Rack Focus
Lights
But as you can create and customize a camera inside of Subsequently Effects, you tin also create and customize lights that will interact with your 3D layers. You can also piece of work with a variety of different low-cal types and customize how each light interacts with layers, adjusting settings such as Intensity, Color, Falloff, and Shadow Darkness. Let'south have a closer look at lights.
Working with Lights
To create a light layer, but highlight the Timeline panel and select Layer > New > Low-cal. Once again, you can customize the calorie-free to your heart'due south content in the Light Settings dialog box. Double click the light layer at whatever fourth dimension to reopen this dialog box and adjust the settings.
When y'all create a new light layer, you have four different calorie-free types from which to cull:Parallel, Spot, Betoken, and Ambient . These low-cal types differ slightly in their controls and how you use them in 3D space. At present let's take a closer await at each light blazon.
Parallel
A Parallel light gives off directional light from an infinitely distant source, mimicking sunlight. You can move a parallel light through 3D space by adjusting Position and Point of Involvement Transform properties. Customize the light'due south Intensity, Color, Falloff, Radius, Falloff Distance, Shadows, and Shadow Darkness in the Calorie-free Options section.

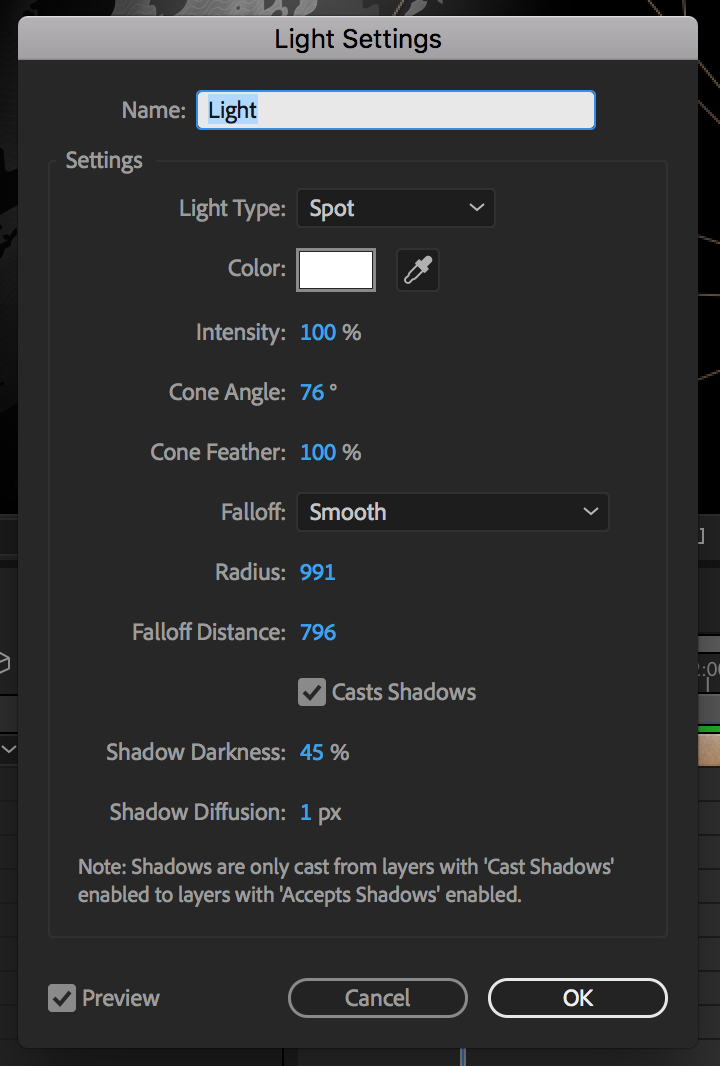
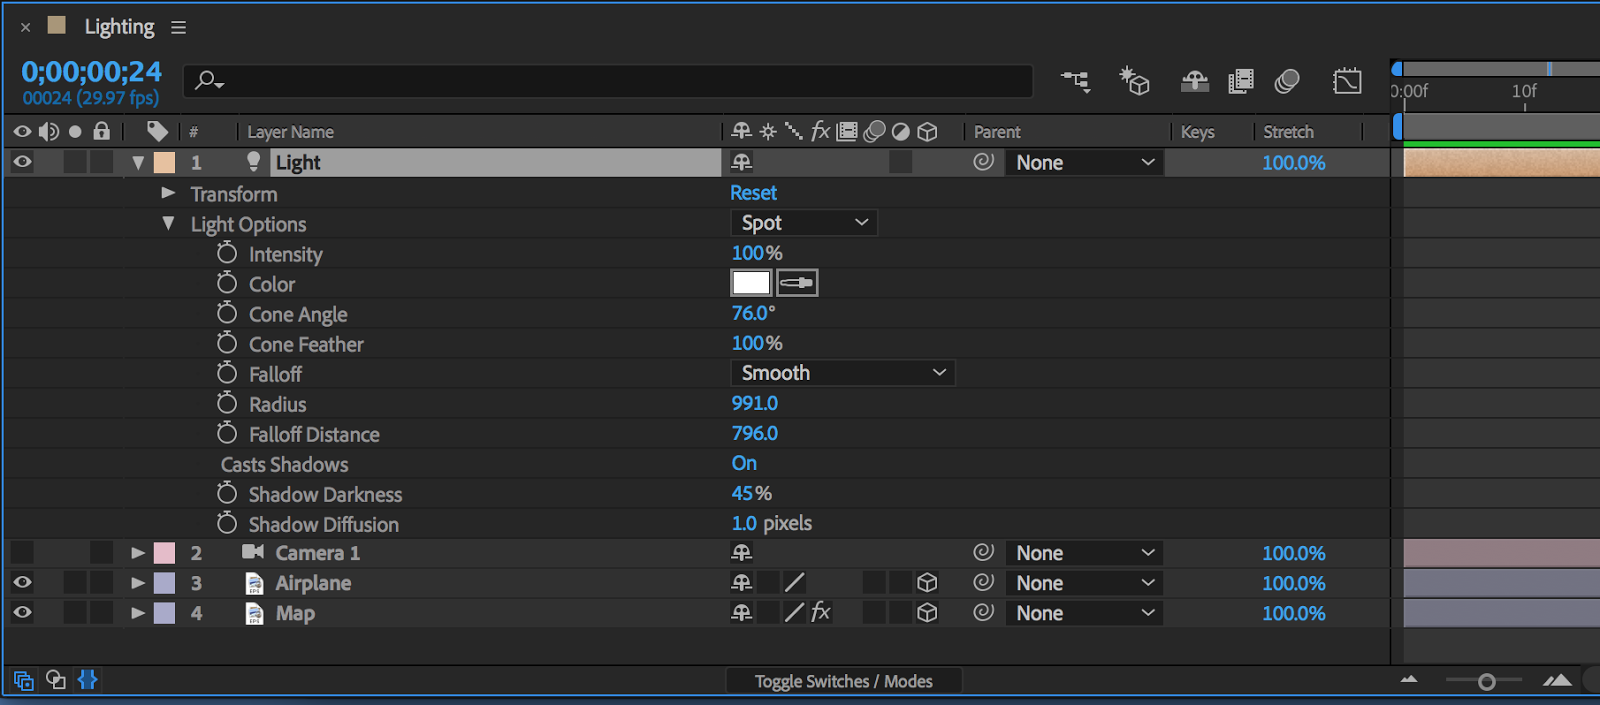
Spot
The Spot calorie-free provides a source of lite constrained past a cone, similar to a spotlight. This light has additional Transform properties, including Orientation and Rotation options. Y'all can also adapt the angle and plumage of the light's "cone" in the light options section, as well as alter Shadow Diffusion.
Indicate
The Point light emits unconstrained omnidirectional light, much like light from a blank bulb. Since it is omnidirectional, this light doesn't have a Point of Interest holding. You lot only have Position attributes in the Transform section. The residuum of the light options are the same every bit the parallel low-cal.
Ambient
Ambient light contributes to the overall brightness of a scene. Information technology has no source and casts no shadows. This simple lite features but 2 options—Intensity and Color. If you stop up with shadows that are likewise harsh from your other lights, an ambient light can fill things out.
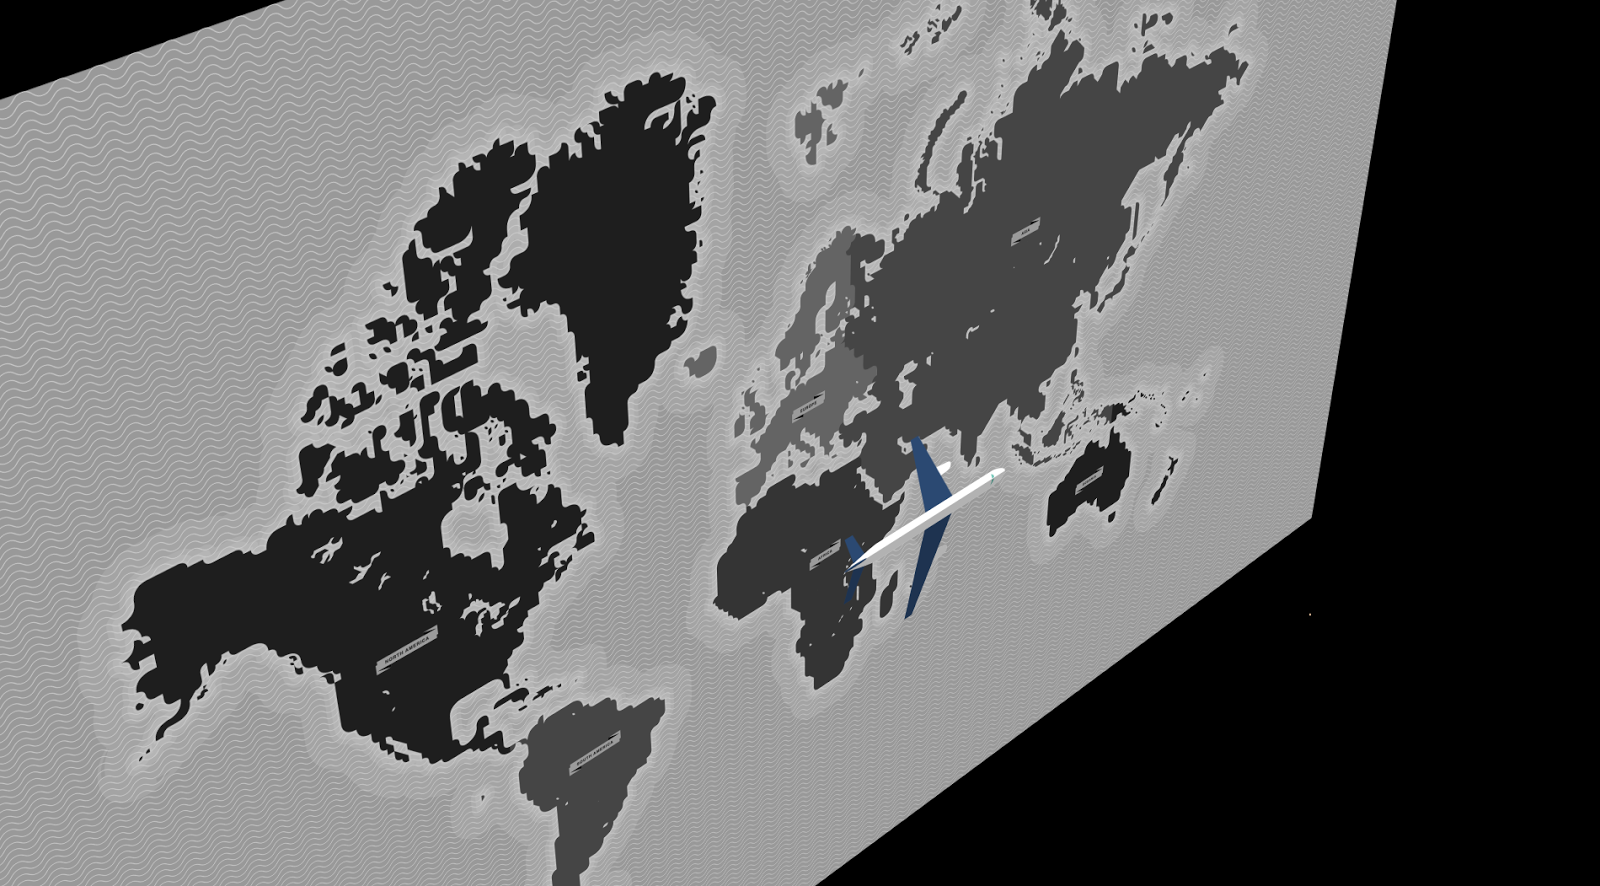
Light Your Scene
There are 2 different ways to customize how a calorie-free interacts with a layer in 3D space.
Calorie-free Options
First, you can customize the Light Options of the actual low-cal layer. As I mentioned to a higher place, each calorie-free type has a different combination of options and properties. Customize and precisely control your low-cal with these options. For instance, change the intensity of a light via percentage, and the color via a color picker. Make adjustments to the cone angle and plume of a Spot low-cal. Select a lite's falloff type, radius, and distance. Specify if you lot want your layer to cast shadows, then customize the darkness and diffusion of those shadows.
Material Options
In addition to changing the Light Options, you tin can adjust the Cloth Options of individual 3D layers. Textile Options specify how a 3D layer reacts to light layers. Nine different options allow you to customize how your layer will accept light and shadows. These options include Cast Shadows, Low-cal Transmission, Accepts Shadows, Accepts Lights, Ambient, Diffuse, Specular Intensity, Specular Shininess, and Metallic.
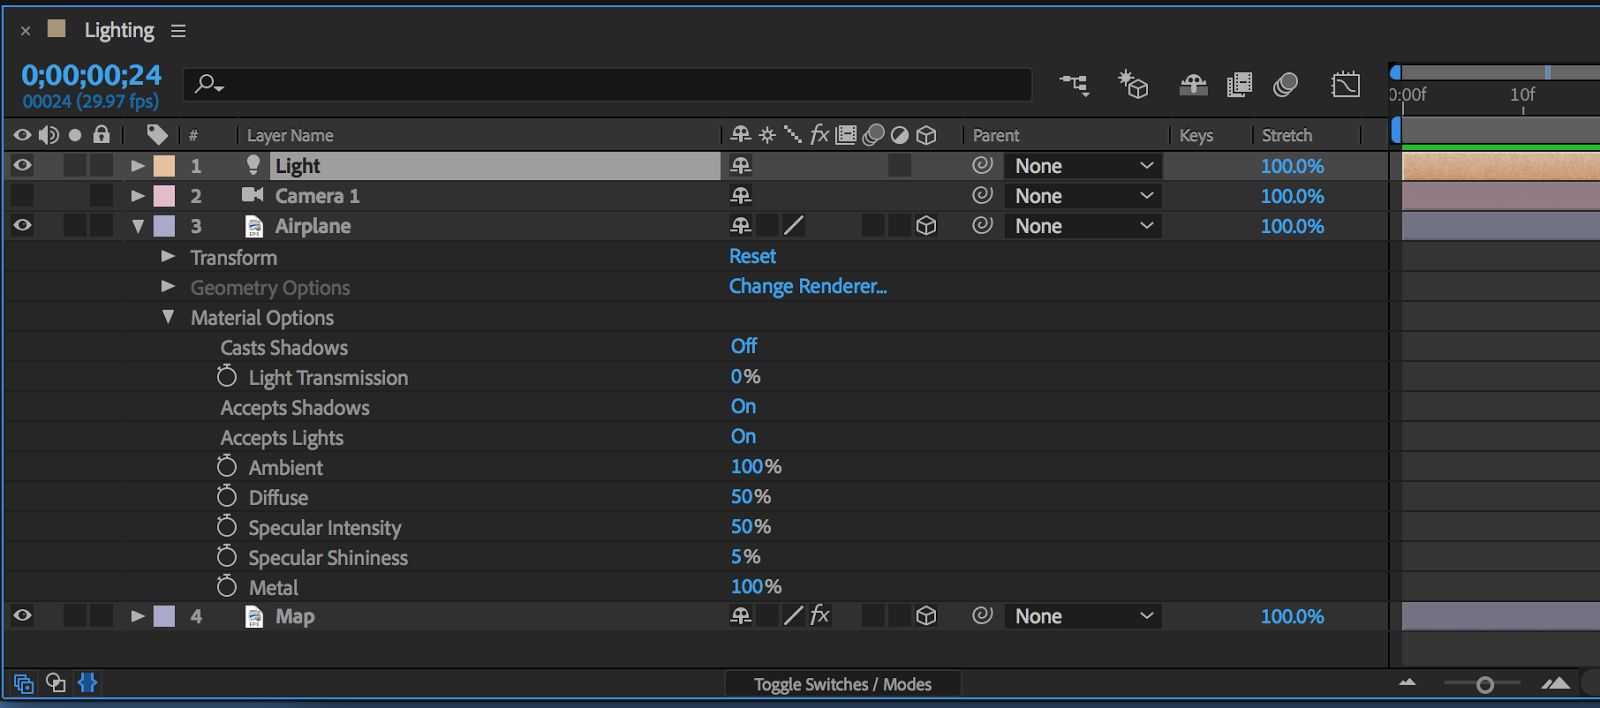
It's of import to remember that simply 3D layers volition be affected by lights—standard 2d layers don't accept Material Options properties bachelor.
Tips for Working in 3D Space
Working in 3D space is all about choices. Once you switch a second layer to 3D, y'all instantly have a number of boosted backdrop to potentially customize. Add life to your composition with light and shadow. Navigate your 3D world with virtual cameras. Cull how lights and shadows effect layers, and how layers react to light and shadows. And every bit if that wasn't enough, you tin then keyframe about anything and everything.
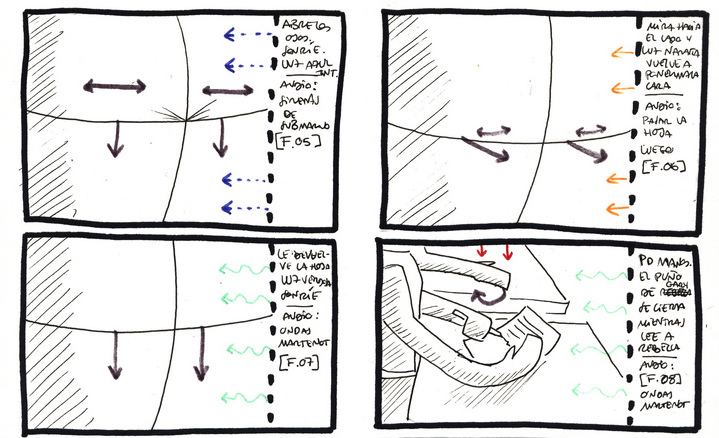
The cardinal to working successfully in a 3D projection is preparation. Put some idea into what lights yous desire to use. Consider possible camera moves and graphic placement, etc. Storyboard your ideas and so you can pre-visualize as much as possible. Think ahead.
If this is your first time working with 3D in After Effects, all of this may seem daunting. Yet, once y'all begin to play effectually with the tools you'll quickly notice that creating movement graphics in 3D is quite unproblematic. With a little marvel and practice, you can achieve some very impressive results in no time.
And last just certainly not least, have fun. (And maybe check out my commodity on 4 ways to take your editing to the side by side level with Later on Furnishings.)
Source: https://blog.frame.io/2017/11/15/working-in-after-effects-3d/
0 Response to "draw a 3d sun in after effects"
Post a Comment